| |
Face Detection and Understanding Reference Frames
Description: Shows how to use the face detection tool and how to manipulate reference frames.Tutorial Level: BEGINNER
Next Tutorial: Running Behaviors from RViz
Frames of Reference: Your Left is My Right, Your Right is My Left

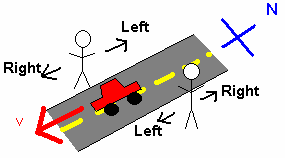
Frames of reference in RCommander and on the PR2 robot defines coordinate systems by which measurements about the physical world are made. As such each link of the robot and sensor has a reference frame. This is so that different parts of the robot can communicate with other parts coherently, a situation similar to what happens in everyday life when you try to give directions to another person. His or her left might be your right and vice versa. For the robot this is just slightly more complicated. Instead of having to worry about only what is left or right, we have to pay attention to what is backward, forward, up, and down.
Each reference frame on the robot defines which directions the X, Y, and Z axis point. To see an example of the robot's active reference frames enable the TF display in RViz by clicking on Add at the bottom of the display panel, then click on TF. A large number of reference frames will appear. You should see something similar to the above video. The display represents the frames as 3 colored lines Red, Green and Blue for the frames X, Y, and Z (use the mnemonic RGB XYZ to keep this straight). Fortunately, we will only need a handful of these frames.
Detecting a Face

RCommander for the PR2 comes with a tool for detecting faces. Activate it by going to the Origin tab, then click on Detect Face. When the face detector sees a human face, it will produce a 3D point estimate of where it thinks the face is. However, it would be really nice to be able to tell the robot to move relative to this point if we, for example, want to hand over an object to this person by saying that the robot should move its gripper to be 30 cm away from, 20 cm to the right of, and -20 cm underneath the face. To do this we will need to turn the singular 3D point into a frame.
SHOW FIGURE OF DETECTED FACE
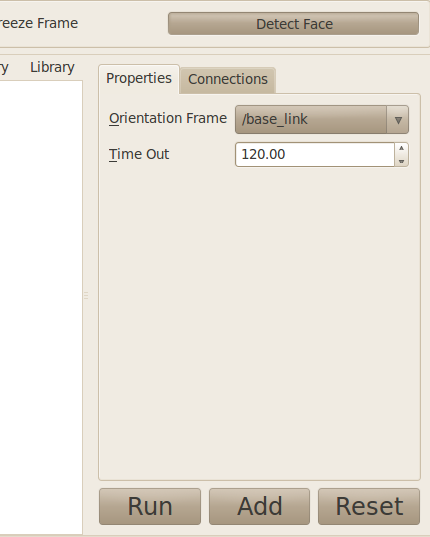
For this purpose, the Detect Face tool as the option Orientation Frame. Instead of stopping with just the 3D point, it will use the orientation of a pre-defined frame on the robot along with the 3D point to create a frame. After detecting a face, the face detector will then create a new frame with the same name as the name of the face detector node (see above). Finally, an additional option is Timeout which specifies how long in seconds the module should look for a face. Let's reduce the timeout to 10 seconds, then add this node to our behavior (click the big Add button).
Moving to the Detected Face
Now that we have a node that will produce a face frame, let's get the robot to move its gripper to the face but at a specific distance away. To do this we will use the Position Priority tool (Manipulation tab).


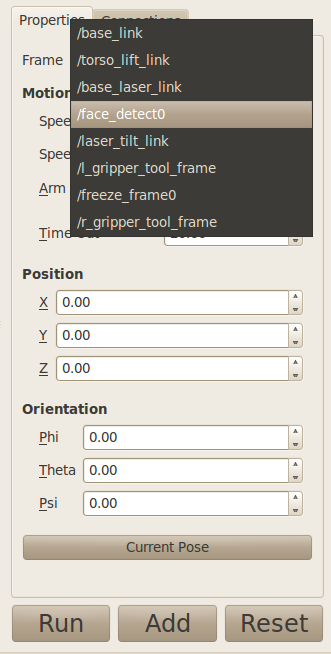
Open the frame drop-down box to look at all the available frames. Our face_detect0 frame will not be in this list yet as the face detect node have not detected a face. To do this, point the PR2's head in the general direction of a person (or a picture of a person), then click on the face detect node (not the face detect button) then click run. If all goes according to plan, you will see a message in the status bar that says succeeded. Now, go back to the Position Priority tool and select face_detect0 as the frame. Verify that the detected face is where you think it should be by selecting the TF display in RViz, and checking the box for face_detect0. You will now see a set of R(ed)G(reen)B(lue) lines where the face was detected. If there are too many other frames uncheck the display all frames option (TODO: find out what this option is called exactly).
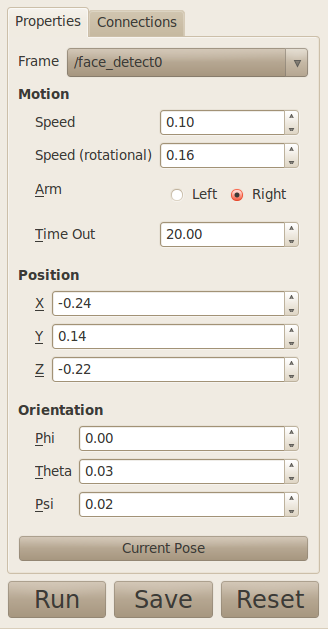
After doing this, the position and orientation fields will now be described as being relative to the face_detect0 frame. Since it's hard to guess a set of number that will work well here, use the RViz display to move the PR2's gripper to a place near the face that you want to robot to move to later then click Current Pose. This will populate these fields with the current pose of the gripper with respect to the face. Now add the node to your robot behavior by clicking Add then connect the face_detect0 node to it.
Congratulations! You now have a basic two action behavior that detects a face then move the robot's hand to it. Try this out by moving the robot a little bit then click Action and Run. The robot should have tried to keep its gripper relative to the face.


