| Note: This tutorial assumes that you have completed the previous tutorials: Recording and playing back data. |
| |
Choosing Good Stereo Parameters
Description: This tutorial walks you through a real-world example of tuning a running stereo_image_proc instance to get the best stereo results, using stereo_view and rviz for visual feedback.Tutorial Level: BEGINNER
Contents
Preliminaries
Make sure you've built these packages:
$ rosmake stereo_image_proc image_view dynamic_reconfigure
We will use the stereo camera data recorded in http://download.ros.org/data/stereo_image_proc/rotating_detergent_1_6.bag (270 MB) in this tutorial.
We need to know what namespace to start stereo_image_proc in, so let's see what topics we've got in the bag:
$ rosbag info rotating_detergent_1_6.bag
...
topics:      /narrow_stereo_textured/left/camera_info    437 msgs @ 14.7 Hz : sensor_msgs/CameraInfo
             /narrow_stereo_textured/left/image_raw      437 msgs @ 14.7 Hz : sensor_msgs/Image
             /narrow_stereo_textured/right/camera_info   437 msgs @ 14.7 Hz : sensor_msgs/CameraInfo
             /narrow_stereo_textured/right/image_raw     437 msgs @ 14.7 Hz : sensor_msgs/Image
Or better yet, use rqt_bag:
$ rqt_bag rotating_detergent_1_6.bag

Our stereo namespace is narrow_stereo_textured. This particular bag contains images of a detergent bottle rotating on a pan-tilt table. The data is from the narrow stereo camera on a PR2 robot, with the textured light projector running to add texture to the scene. Without this artificial texture, stereo correlation would fail on blank regions like the walls and tabletop.
Start the stereo processing node
When we launch stereo_image_proc in the narrow_stereo_textured namespace, it will automatically connect to our camera topics:
$ ROS_NAMESPACE=narrow_stereo_textured rosrun stereo_image_proc stereo_image_proc
We will use dynamic_reconfigure to change the stereo processing parameters on the fly. Launch the reconfigure GUI:
$ rosrun rqt_reconfigure rqt_reconfigure
reconfigure_gui started
In the drop-down menu, choose /narrow_stereo_textured/stereo_image_proc_XXX. You should see:
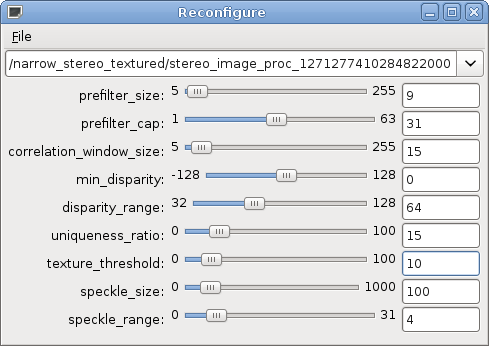
Make sure that your settings match the defaults shown above.
What do those parameters mean?
The parameters control various aspects of the block matching algorithm used by stereo_image_proc to find correspondences between the left and right images. The algorithm has three phases:
- Pre-filtering to normalize image brightness and enhance texture.
- Correspondence search along horizontal epipolar lines using an SAD window.
- Post-filtering to eliminate bad correspondence matches.
Brief descriptions of each parameter can be found in the stereo_image_proc parameter listing. In this tutorial we'll take a hands-on approach to learning what the parameters do.
For an in-depth discussion of the block matching algorithm, see pages 438-444 of Learning OpenCV.
Start the visualization nodes
These nodes won't actually show anything until we play back the bag, but we'll start them now anyway.
The best way to troubleshoot stereo issues is by looking at the disparity image. The stereo_view utility will display a color-mapped version of the disparity image alongside the left and right camera images:
$ rosrun image_view stereo_view stereo:=narrow_stereo_textured image:=image_rect
Separate the three windows if necessary.
OPTIONAL: Start rviz
This tutorial will only assume that you're looking at the disparity image, but viewing the stereo point cloud in rviz is also useful. If you've built rviz, do:
$ rosrun rviz rviz
In the Display panel click Add and choose Point Cloud. Click on "Fill in topic here..." then the button that appears on the right of the text box. Choose the narrow_stereo_textured/points topic. Since the bag doesn't contain tf information, so you will need to set the fixed and target frames to that of the camera, /narrow_stereo_optical_frame.
Start bag playback
Now we're ready to stream data into our system:
$ rosbag play rotating_detergent_1_6.bag -r 0.1
This plays the bag at one-tenth speed so we have time to tinker. All of the nodes we're running are stateless with respect to time, so if the bag stops you can simply play it again. You should now see data appear in your stereo_view (and rviz).
My disparity image is blank!
Depending on your scene and stereo settings, you may encounter an empty disparity image.


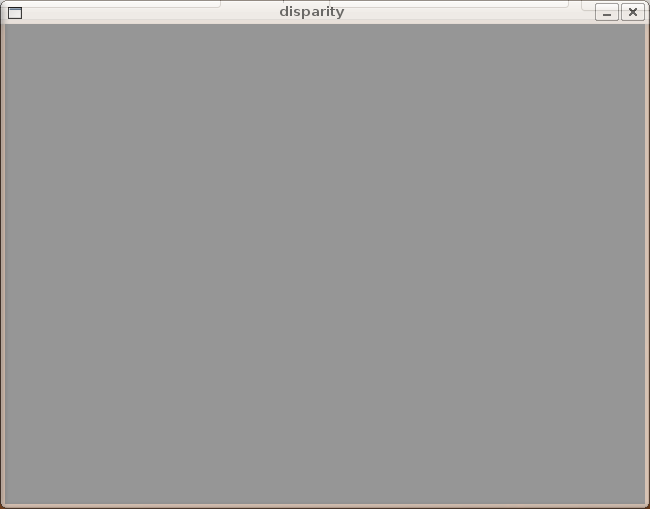
This means that one or more of the post-filtering thresholds is set too high. The most likely culprit is texture_threshold, which filters out areas that don't have enough texture for reliable matching. If you move texture_threshold up and down, you should see the disparities disappear and reappear. texture_threshold=10 is the default and tends to work well.
What's this junk on the tabletop?
You should notice lots of little disparity blobs at apparently random depths where the table and detergent should be.
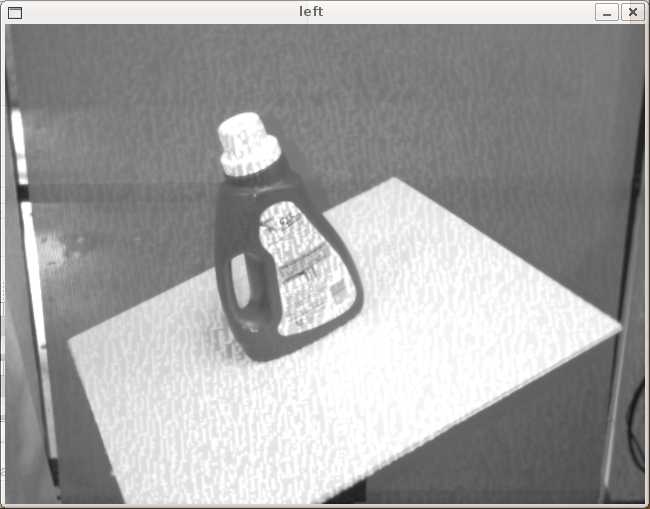

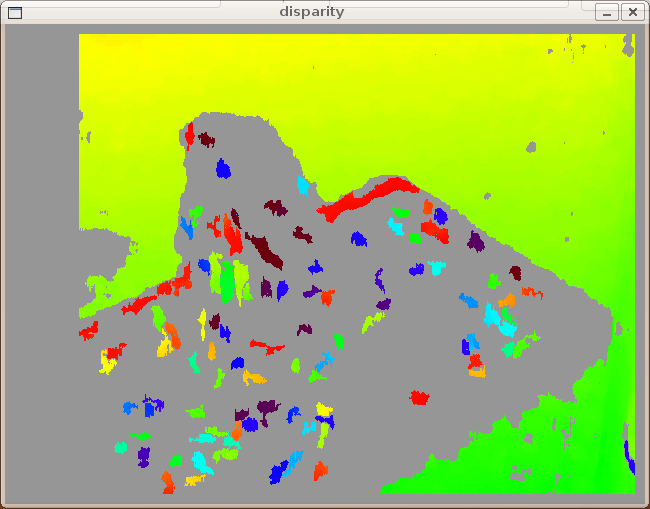
Block-based matchers often produce these "speckles" near the boundaries of objects, where the matching window catches the foreground on one side and the background on the other. In this scene it appears that the matcher is also finding small spurious matches in the projected texture on the table.
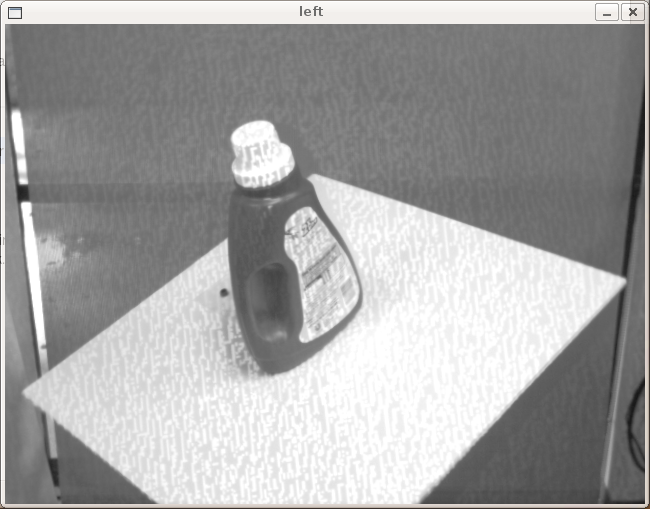
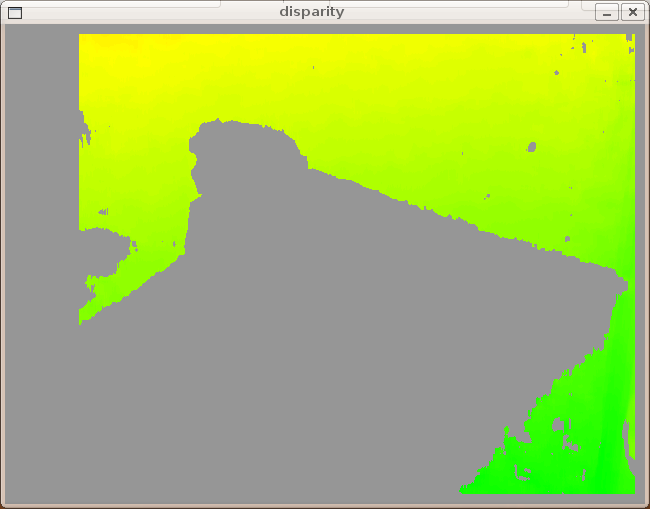
To get rid of these artifacts we post-process the disparity image with a speckle filter controlled by the speckle_size and speckle_range parameters. speckle_size is the number of pixels below which a disparity blob is dismissed as "speckle." speckle_range controls how close in value disparities must be to be considered part of the same blob. In this case the objects in the scene are relatively large, so we can crank speckle_size up to 1000 pixels:

But where are the table and object?
At this point we have a nice depth gradient for the wall behind the pan-tilt table. But there is a gaping hole in our disparity image where the table and detergent should be. What is going on?
The problem is that the table is too close to the camera for the stereo block matcher (with the current settings) to "see" it. This is an artifact of the way block matching works. For each pixel in the left image, the matcher slides a window across some range of pixels in the corresponding row of the right image, looking for the most similar region. The search range is determined by two parameters:
disparity_range is how many pixels to slide the window over. The larger it is, the larger the range of visible depths, but more computation is required.
min_disparity controls the offset from the x-position of the left pixel at which to begin searching.
The block matcher can return disparities in the range [min_disparity, min_disparity + disparity_range). Since depth is inversely proportional to disparity, these two parameters determine the horopter, or 3D volume covered by the search range. Objects outside the horopter are invisible to the algorithm.
In this case the disparity search range is [0, 64). The table contains disparities greater than 64, so it falls in front of the horopter. Increasing disparity_range to 128 expands the horopter to include the table:

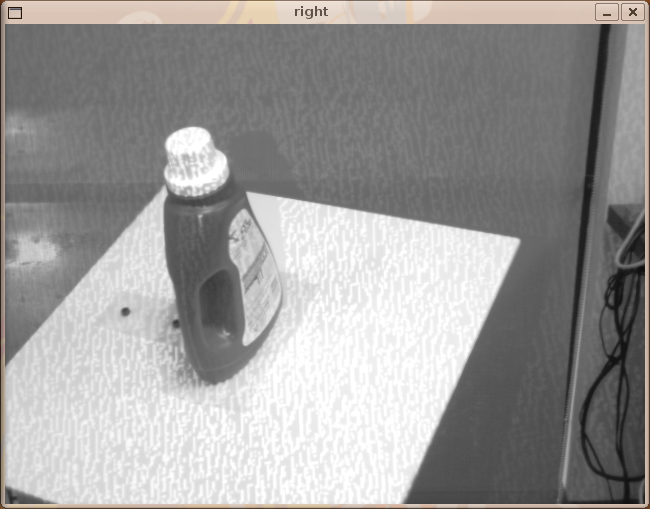
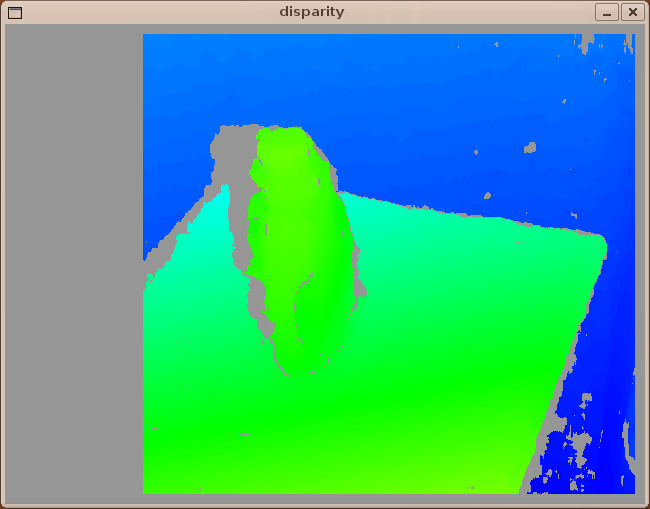
Notice the blank area to the left of the detergent bottle. That area is visible to the left camera but occluded by the bottle in the right camera. You may notice that the empty left margin of the disparity image has doubled in size; that is also related to disparity_range.
If you are running rviz, you can see the reconstructed 3D point cloud:
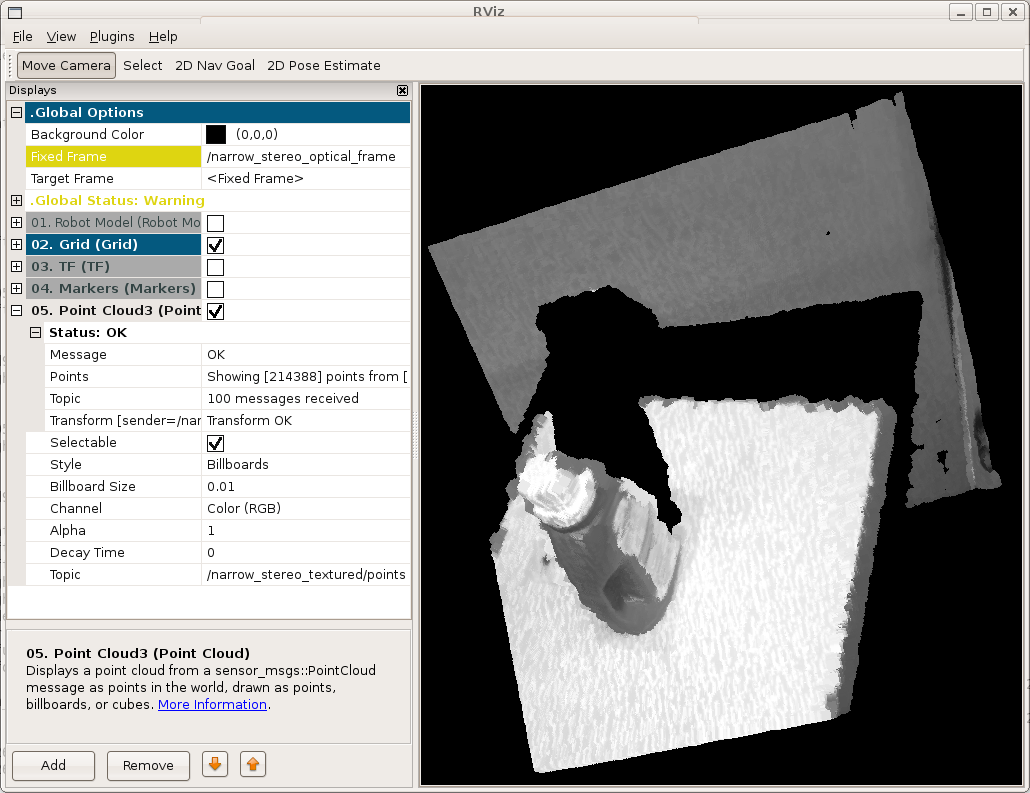
min_disparity is normally set to zero, meaning the block matcher can "see" out to infinity. If you have a pair of stereo cameras that are verged, or inclined towards each other, it's possible to have negative disparities and you might set min_disparity to a negative value. If you want to detect objects very close to the camera (disparity > 128), you could set min_disparity to a positive value, shifting the horopter towards the camera and sacrificing far-field for near-field perception.
For example, try dropping disparity_range to 96 and incrementally increase min_disparity. Around min_disparity = 50 you should see the table and detergent fade into view and the wall behind them fade out:


Other parameters
It's less likely that you'll need to tweak parameters that haven't already been mentioned above. For the sake of completeness:
correlation_window_size controls the size of the sliding SAD (sum of absolute differences) window used to find matching points between the left and right images. Larger window sizes will smooth over small gaps in the disparity image but will also smear object boundaries. The default (15x15) is normally adequate; for comparison, this disparity image used correlation_window_size = 9 and has more gaps:

uniqueness_ratio controls another post-filtering step. If the best matching disparity is not sufficiently better than every other disparity in the search range, the pixel is filtered out. You can try tweaking this if texture_threshold and the speckle filtering are still letting through spurious matches.
prefilter_size and prefilter_cap control the pre-filtering phase, which normalizes image brightness and enhances texture in preparation for block matching. Normally you should not need to adjust these.
Conclusion
Congrats! Now you are prepared to use stereo_image_proc with your own stereo camera.
Further improve the result
With post-filtering offered by OpenCV3, the disparity image can be more smooth and have less fragment.link
Download the source code of image_pipeline, modify file and recompile it along with cv-bridge. Also, you should have install OpenCV3 library.


