keywords = audio detection, microphone, ROAR
| Note: This tutorial assumes that you have completed the previous tutorials: roar/Tutorials/Trainer. |
| |
Detecting a new audio event using the ROAR detector
Description: This tutorial teaches you how to use the ROAR package to detect learned audio-event modelsTutorial Level: BEGINNER
Contents
This tutorial consists of two parts, the first shows you how to launch the actionlib based action server that can detect audio sounds, and the second shows you how you can write code to interact with this server.
Launching the Detector Node
After you have properly created a model using the ROAR Trainer, you must launch the ROAR detector action-server node to detect the sound. The detector can be launched as follows:
roslaunch roar roar_detector.launch model_name:=hand_clap
Note the convention is to leave off the .mat (hand_clap.mat) extension for your model file you created during training. This assumes you have placed all your model .mat files inside of roar/models/. If you wish to use a different directory it can be specified by modifying the roar_detector.launch file, or launching with:
roslaunch roar roar_detector.launch model_name:=hand_clap model_path:=/some/path/
If the detector launches successfully you should see something like:
Loaded normalized features.
[INFO] [WallTime: 1311100573.173355] background_subtracted
Note that background subtraction happens when you launch the detector, so it is important the room is quiet during this launch. You can redo the background subtraction at any time using the empty service call /roar/mymodel/background_subtract.
Communicating with the Detector
Several examples exist in the ROAR package for communicating with the detector node once it is running.
GUI Detector
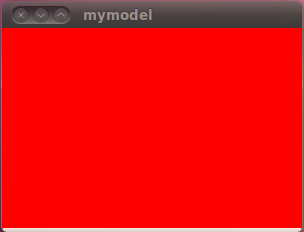
The best way to check whether a model you made is working properly or not is to use the GUI Detector. It is recommended you do this first before doing integrating the detector calls into your own code. The GUI test provides one example for communicating with the ROAR detector, and interested programmers can find the code here. To run the detector type:
rosrun roar audio_test_gui.py hand_clap
After which a GUI box should open on your screen. Red means your sound was not heard, and green means your sound was heard. The box should flash green when you make your sound you trained the model on.

One-Shot Detector Example
One way to use the ROAR detector is to have it run until the audio-clip of interest is heard, and then have the action-server enter a dormant state. In this case the Succeeded state of the action-server indicates to the programmer that their sound was heard.
A simple programming example of this usage can be found as part of the ROAR package here.
You can run this example simply by typing:
rosrun roar audio_test_single.py hand_clap
Continuous Audio Detector Example
A different way to use the ROAR detector is to have it always running continuously, even in the event of positive or negative audio detection. In this case the presence of Feedback being published from the ROAR detector action server indicates the sound was heard.
A simple programming example of this usage can be found as part of the ROAR package here.
rosrun roar audio_test_continuous.py hand_clap


