| |
PR2 Simulator Workshop
Description: This tutorial explores basic PR2 interfaces while using the PR2 in simulation.Tutorial Level: BEGINNER
Contents
The PR2 Simulator
In this lab, you will be working mostly with a simulated version of the PR2. First, set your ROS_MASTER_URI to localhost and export ROBOT as sim to trigger the system to use pr2_machine/sim.machine by typing the following or adding them to your .bashrc:
export ROS_MASTER_URI=http://localhost:11311
export ROBOT=sim
In a separate terminal, launch the simulator using the roslaunch command. The roslaunch command operates on special xml files to launch your ROS programs and executables.
roslaunch pr2_gazebo pr2_empty_world.launch
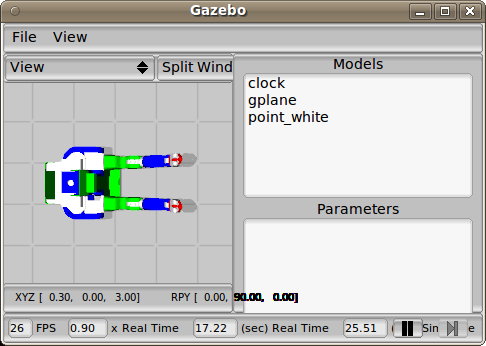
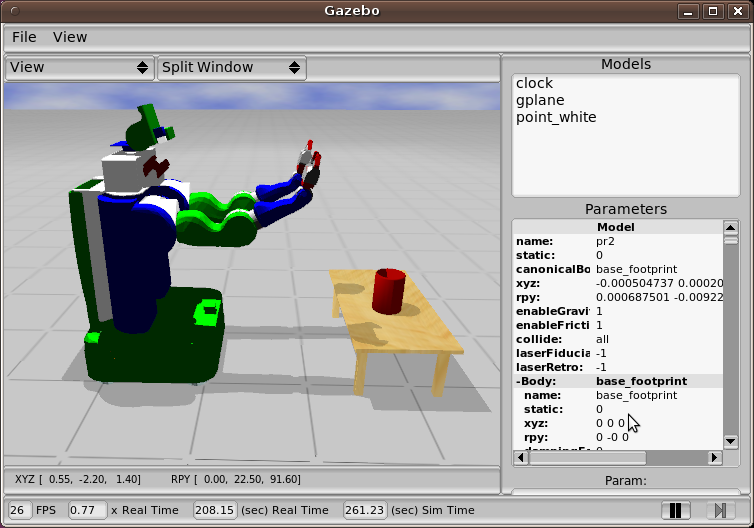
You should see the simulator come up in a separate window. Recall we can use the ROS tools to explore the ROS API and environment that the simulator offers. The main concepts that you should focus on are the following:
- ROS nodes - ROS nodes are the executables in ROS. ROS is designed to be lightweight specifically so that you can easily wrap your library into a ROS node.
- ROS topics and services - topics and services are the two means of communication between nodes. Services let you query a node and receive a reply for your query within one call while topics let you broadcase information that other nodes can subscribe and listen to.
- ROS parameter server - the ROS parameter server stores parameters and lets you access them at runtime. The parameter server provides an easy interface to configure your nodes using parameters specified in launch files.
PR2 Dashboard
You can use [rqt_pr2_dashboard] to visualize the state of the robot
rosmake rqt_pr2_dashboard
rosrun rqt_pr2_dashboard rqt_pr2_dashboard

Feel free to browse around and see what's available while running the simulator. Notice that motor diagnostics, breakers and runstops are not simulated by the simulator.
Robot Visualization
By now you should be familiar rviz so you can visualize everything from the robot model to sensor data. Start rviz in a separate terminal:
Start up rviz
rosrun rviz rviz
- (you will have to do this twice the very first time you start rviz on a fresh install)
- Click on the Add button and choose "Robot Model" from the drop-down list. Click "OK".
- If the simulator is not running, start the simulator.
- Click on the field next to the "Fixed Frame" field. From the drop-down list, choose "/base_link" as your fixed frame. (More about these frames in workshop).
- You should see the robot in the visualizer window now.
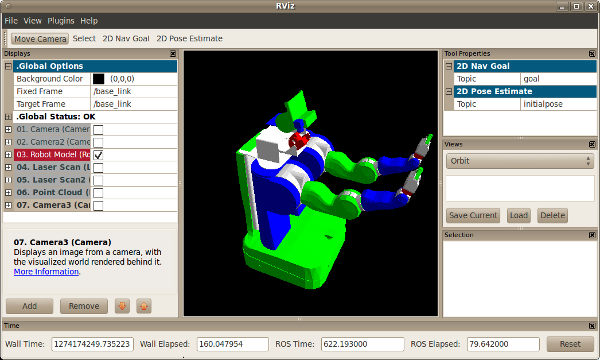
Explore the other things you can add using the Add button. E.g., click on the camera and set the image topic to /wide_stereo/left/image_rect_color to see the rectified image from left wide stereo camera. 
Controlling the PR2 Mobile Base
In addition to driving the PR2 with the joystick, you can drive the PR2 around using the keyboard quite easily as well. (You need to keep the window in which you launch this node in focus while you drive the robot around).
roslaunch pr2_teleop teleop_keyboard.launch
What topic do you think the command to the base controller is going out on? Use the ROS tools you have learnt about so far to display the command going to the base controller. Also display the odometric frame in rviz.
PR2 Laser Tilt Service Call Example
You can invoke the tilt laser trajectory by making a service call on the robot or in simulation, for example:
rosservice call laser_tilt_controller/set_periodic_cmd '{ command: { header: { stamp: 0 }, profile: "linear" , period: 3 , amplitude: 1 , offset: 0 }}'Use rviz to visualize the laser scans produced under ROS topic tilt_scan.
Controlling the PR2 Arm (C-Turtle ONLY)
![]() Please note this controller is no longer offered in diamondback. For moving PR2 gripper in diamondback, please see this tutorial.
Please note this controller is no longer offered in diamondback. For moving PR2 gripper in diamondback, please see this tutorial.
We can control the arm from the command line by publishing messages to actions. As an example, we will try to open the PR2's right gripper.
First we need to find the appropriate topic.
rostopic list | grep r_gripper
We see that there is a topic called "/r_gripper_controller/command", which seems like a good choice. Let's see what type of message it requires.
rostopic info /r_gripper_controller/command
From this we see that we need to produce a message of type "pr2_controllers_msgs/Pr2GripperCommand". The following command allows us to see the details of this message.
rosmsg show pr2_controllers_msgs/Pr2GripperCommand
In order to command the gripper, we need to supply a floating point position and max_effort value. We now have enough information to open the gripper by publishing a message to "r_gripper_controller/command" using the "pr2_controllers_msgs/Pr2GripperCommand" message
rostopic pub r_gripper_controller/command pr2_controllers_msgs/Pr2GripperCommand "{position: 0.06, max_effort: 100.0}"
PR2 Navigation Stack Demo
Details of the PR2 navigation stack will be covered later, but for now, we can use it to take the simulated PR2 for a test drive. To do so, you will have to first rosmake the necessary components
rosmake pr2_navigation_perception pr2_navigation_teleop pr2_navigation_global fake_localization amcl map_server
Create a launch script for starting all necessary navigation components, and save it as ~/pr2_nav_tutorial.launch:
<launch>
  <!-- machine tags for sim, be sure to set environment variable ROBOT to sim -->
  <include file="$(find pr2_machine)/sim.machine" />
  <include file="$(find pr2_navigation_global)/amcl_node.xml" />
  <include file="$(find pr2_navigation_teleop)/teleop.xml" />
  <include file="$(find pr2_navigation_perception)/lasers_and_filters.xml" />
  <!--include file="$(find 2dnav_pr2)/config/map_server.launch" /-->
  <include file="$(find pr2_navigation_perception)/ground_plane.xml" />
  <!-- The navigation stack and associated parameters -->
  <include file="$(find pr2_navigation_global)/move_base.xml" />
  <node name="map_server" pkg="map_server" type="map_server" args="$(find gazebo_ros)/Media/materials/textures/map_blank.png 0.1" respawn="true" />
</launch>
And roslaunch the script:
roslaunch ~/pr2_nav_tutorial.launch
Startup rviz for navigation
roslaunch pr2_navigation_global rviz_move_base.launch
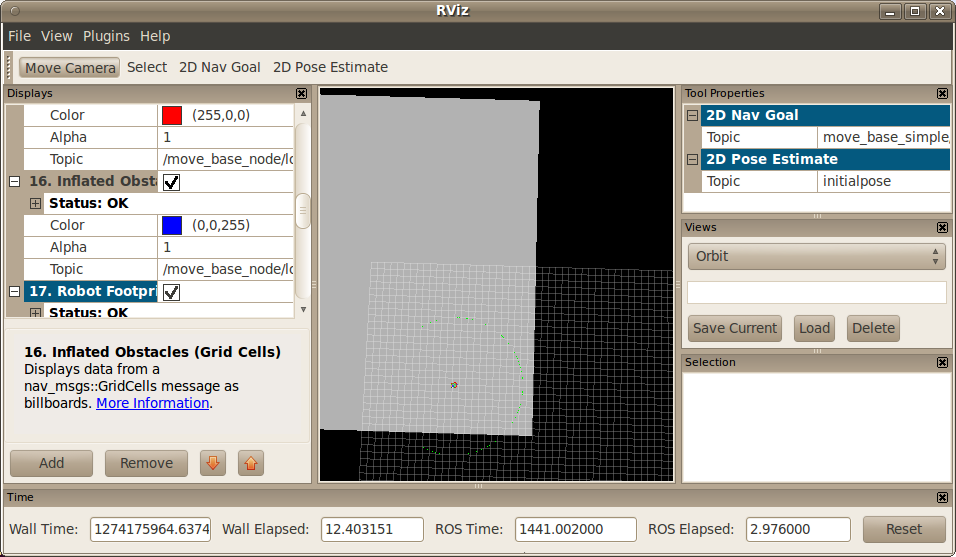 p This brings up the 2D navigation stack with a "blank" map. Next, click on 2D Pose Estimate button on top of the screen and click+drag any location in the area marked in white to specify an initial pose estimate. Click on the 2D Nav Goal button and click+drag the mouse on the area to set a navigation goal. The robot will begin to drive towards the goal you have just chosen, but notice that in this particular test case, the red arrows (AMCL cloud) does not converge due to lack of obstacles.

Building a Custom Object for Testing
In the next exercise, we'll create an URDF object and spawn it in simulation. Copy and past the following code block into a file named drawer.urdf:
   1 <robot name="drawer">
   2   <!-- simplify the drawer as a box -->
   3   <link name="drawer">
   4     <inertial>
   5       <mass value="5.0" />
   6       <origin xyz="0 0 0.25" />
   7       <inertia  ixx="1.0" ixy="0.0"  ixz="0.0"  iyy="1.0"  iyz="0.0"  izz="1.0" />
   8     </inertial>
   9     <visual>
  10       <!-- visual origin is defined w.r.t. link local coordinate system -->
  11       <origin xyz="0 0 0.25" rpy="0 0 0" />
  12       <geometry>
  13         <box size="0.3 0.3 0.5" />
  14       </geometry>
  15     </visual>
  16     <collision>
  17       <!-- collision origin is defined w.r.t. link local coordinate system -->
  18       <origin xyz="0 0 0.25" rpy="0 0 0 " />
  19       <geometry>
  20         <box size="0.3 0.3 0.5" />
  21       </geometry>
  22     </collision>
  23   </link>
  24   <gazebo reference="drawer">
  25     <material>GazeboWorlds/StereoProjectionPattern</material>
  26     <turnGravityOff>false</turnGravityOff>
  27   </gazebo>
  28
  29   <joint name="top_drawer_joint" type="prismatic" >
  30     <axis xyz="-1 0 0" />
  31     <parent link="drawer" />
  32     <child link="top_drawer" />
  33     <origin xyz="0 0 .375" rpy="0 0 0" />
  34     <limit lower="0.0" upper="0.2" effort="100" velocity="100" />
  35   </joint>
  36   <link name="top_drawer">
  37     <inertial>
  38       <mass value="0.5" />
  39       <origin xyz="0.2 0 0" />
  40       <inertia  ixx="1.0" ixy="0.0"  ixz="0.0"  iyy="1.0"  iyz="0.0"  izz="1.0" />
  41     </inertial>
  42     <visual>
  43       <origin xyz="-0.001 0 0" rpy="0 0 0" />
  44       <geometry>
  45         <box size="0.3 0.25 0.2" />
  46       </geometry>
  47     </visual>
  48     <collision>
  49       <origin xyz="-0.001 0 0" rpy="0 0 0" />
  50       <geometry>
  51         <box size="0.3 0.25 0.2" />
  52       </geometry>
  53     </collision>
  54   </link>
  55   <gazebo reference="top_drawer">
  56     <material>Gazebo/Green</material>
  57     <turnGravityOff>false</turnGravityOff>
  58     <dampingFactor>0.02</dampingFactor>
  59   </gazebo>
  60
  61   <joint name="top_drawer_knob_joint" type="fixed" >
  62     <parent link="top_drawer" />
  63     <child link="top_drawer_knob" />
  64     <origin xyz="-0.15 0 0" rpy="0 0 0" />
  65   </joint>
  66   <link name="top_drawer_knob">
  67     <inertial>
  68       <mass value="0.1" />
  69       <origin xyz="0 0 0" />
  70       <inertia  ixx="0.1" ixy="0.0"  ixz="0.0"  iyy="0.1"  iyz="0.0"  izz="0.1" />
  71     </inertial>
  72     <visual>
  73       <origin xyz="-0.02 0 0" rpy="0 0 0" />
  74       <geometry>
  75         <sphere radius="0.02" />
  76       </geometry>
  77     </visual>
  78     <collision>
  79       <origin xyz="-0.02 0 0" rpy="0 0 0" />
  80       <geometry>
  81         <sphere radius="0.02" />
  82       </geometry>
  83     </collision>
  84   </link>
  85   <gazebo reference="top_drawer_knob">
  86     <dampingFactor>0.01</dampingFactor>
  87     <material>Gazebo/Red</material>
  88     <turnGravityOff>false</turnGravityOff>
  89   </gazebo>
  90
  91   <joint name="bottom_drawer_joint" type="prismatic" >
  92     <axis xyz="-1 0 0" />
  93     <parent link="drawer" />
  94     <child link="bottom_drawer" />
  95     <origin xyz="0 0 .125" rpy="0 0 0" />
  96     <limit lower="0.0" upper="0.2" effort="100" velocity="100" />
  97   </joint>
  98   <link name="bottom_drawer">
  99     <inertial>
 100       <mass value="0.5" />
 101       <origin xyz="0.2 0 0" />
 102       <inertia  ixx="1.0" ixy="0.0"  ixz="0.0"  iyy="1.0"  iyz="0.0"  izz="1.0" />
 103     </inertial>
 104     <visual>
 105       <origin xyz="-0.001 0 0" rpy="0 0 0" />
 106       <geometry>
 107         <box size="0.3 0.25 0.2" />
 108       </geometry>
 109     </visual>
 110     <collision>
 111       <origin xyz="-0.001 0 0" rpy="0 0 0" />
 112       <geometry>
 113         <box size="0.3 0.25 0.2" />
 114       </geometry>
 115     </collision>
 116   </link>
 117   <gazebo reference="bottom_drawer">
 118     <material>Gazebo/Green</material>
 119     <turnGravityOff>false</turnGravityOff>
 120     <dampingFactor>0.02</dampingFactor>
 121   </gazebo>
 122
 123   <joint name="bottom_drawer_knob_joint" type="fixed" >
 124     <parent link="bottom_drawer" />
 125     <child link="bottom_drawer_knob" />
 126     <origin xyz="-0.15 0 0" rpy="0 0 0" />
 127   </joint>
 128   <link name="bottom_drawer_knob">
 129     <inertial>
 130       <mass value="0.1" />
 131       <origin xyz="0 0 0" />
 132       <inertia  ixx="0.1" ixy="0.0"  ixz="0.0"  iyy="0.1"  iyz="0.0"  izz="0.1" />
 133     </inertial>
 134     <visual>
 135       <origin xyz="-0.02 0 0" rpy="0 0 0" />
 136       <geometry>
 137         <sphere radius="0.02" />
 138       </geometry>
 139     </visual>
 140     <collision>
 141       <origin xyz="-0.02 0 0" rpy="0 0 0" />
 142       <geometry>
 143         <sphere radius="0.02" />
 144       </geometry>
 145     </collision>
 146   </link>
 147   <gazebo reference="bottom_drawer_knob">
 148     <dampingFactor>0.01</dampingFactor>
 149     <material>Gazebo/Red</material>
 150     <turnGravityOff>false</turnGravityOff>
 151   </gazebo>
 152
 153   <gazebo>
 154     <controller:gazebo_ros_p3d name="top_drawer_knob_p3d_controller" plugin="libgazebo_ros_p3d.so">
 155         <alwaysOn>true</alwaysOn>
 156         <updateRate>100.0</updateRate>
 157         <bodyName>top_drawer_knob</bodyName>
 158         <topicName>top_drawer_knob_pose</topicName>
 159         <frameName>/base_link</frameName>
 160         <interface:position name="top_drawer_knob_p3d_link_position"/>
 161     </controller:gazebo_ros_p3d>
 162     <controller:gazebo_ros_sim_iface name="sim_iface_drawer_controller" plugin="libgazebo_ros_sim_iface.so">
 163         <alwaysOn>true</alwaysOn>
 164         <modelName>drawer</modelName>
 165         <topicName>set_drawer_pose_topic</topicName>
 166         <serviceName>set_drawer_pose_service</serviceName>
 167         <frameName>/base_link</frameName>
 168         <xyz>0 0 0</xyz>
 169         <rpy>0 0 0</rpy>
 170         <vel>0 0 0</vel>
 171         <angVel>0 0 0</angVel>
 172         <interface:position name="sim_iface_drawer_position"/>
 173     </controller:gazebo_ros_sim_iface>
 174   </gazebo>
 175
 176 </robot>
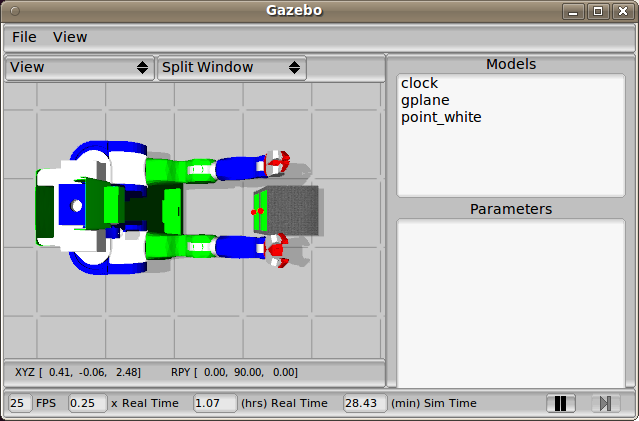
Next, select File-->Reset in the Gazebo GUI to reset simulation. Then spawn the object URDF by calling
rosrun gazebo spawn_model -urdf -file drawer.urdf -model drawer1 -x 1.0
and the drawer should appear before the PR2
Adding an STL Mesh Object in Simulation
You can also use trimeshes as visual and collision bodies for objects in simulation. For example, here's a table from the Google 3D warehouse. Unfortunately boxturtle version of Gazebo does not support exported formats from Google 3D warehouse, so you must convert it to a STL mesh. The COLLADA file has been converted to a STL file here for your convenience. Save this file in gazebo_worlds/Media/models,
cp table.stl `rospack find gazebo_worlds`/Media/models/
Next, create an urdf file called table.urdf
<robot name="table_model">
  <link name="table_body">
    <inertial>
      <mass value="1.0" />
      <!-- center of mass (com) is defined w.r.t. link local coordinate system -->
      <origin xyz="0.25 -0.5 0" />
      <inertia  ixx="1.0" ixy="0.0"  ixz="0.0"  iyy="1.0"  iyz="0.0"  izz="1.0" />
    </inertial>
    <visual>
      <!-- visual origin is defined w.r.t. link local coordinate system -->
      <origin xyz="0 0 0" rpy="3.1416 0 0" />
      <geometry>
        <mesh filename="table.stl" scale="0.01 0.01 0.01"/>
      </geometry>
    </visual>
    <collision>
      <!-- collision origin is defined w.r.t. link local coordinate system -->
      <origin xyz="0 0 0" rpy="3.1416 0 0" />
      <geometry>
        <mesh filename="table.stl" scale="0.01 0.01 0.01"/>
      </geometry>
    </collision>
  </link>
  <gazebo reference="table_body">
    <material>Gazebo/LightWood</material>
  </gazebo>
</robot>
Note that the Center of mass is placed near the center of the table top given the STL mesh origin 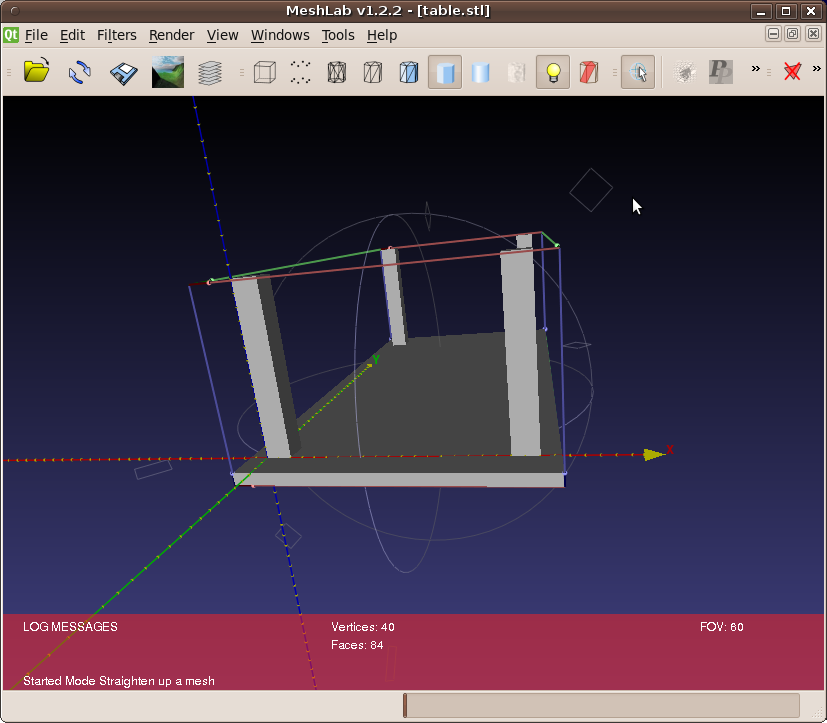 .
.
Start the PR2 in an empty world
roslaunch pr2_gazebo pr2_empty_world.launch
and spawn the table in simulation
rosrun gazebo spawn_model -urdf -file table.urdf -model table -x 1.0 -y 0.5 -z 0.3
spawn a cup on the table
rosrun gazebo spawn_model -gazebo -file `rospack find gazebo_worlds`/objects/coffee_cup.model -model coffee_cup -x 1.2 -z 1
