| Note: This tutorial only works using Diamondback. For a roughly equivalent tutorial for Electric please see Adding Virtual Objects to a Planning Scene. This tutorial assumes that you have completed the previous tutorials: Making collision maps from self-filtered tilting laser data Checking robot states for validity. |
| |
Adding known objects to the motion planning environment
Description: This tutorial will introduce the topic of adding known objects to the collision environment. Known objects are shapes that have been recognized by a semantic perception pipeline or are known to exist at particular positions by a system designer.Tutorial Level: ADVANCED
Next Tutorial: Attaching objects to the robot's body
Contents
This tutorial introduces how to insert and use known objects in the motion planning environment. These objects can be inserted directly as shape primitives or triangle meshes at particular poses in the world and can then be subject to collision checking. This tutorial will explain how to add the objects, move the objects, delete the objects, check collisions against the objects, and filter points corresponding to the objects from laser data.
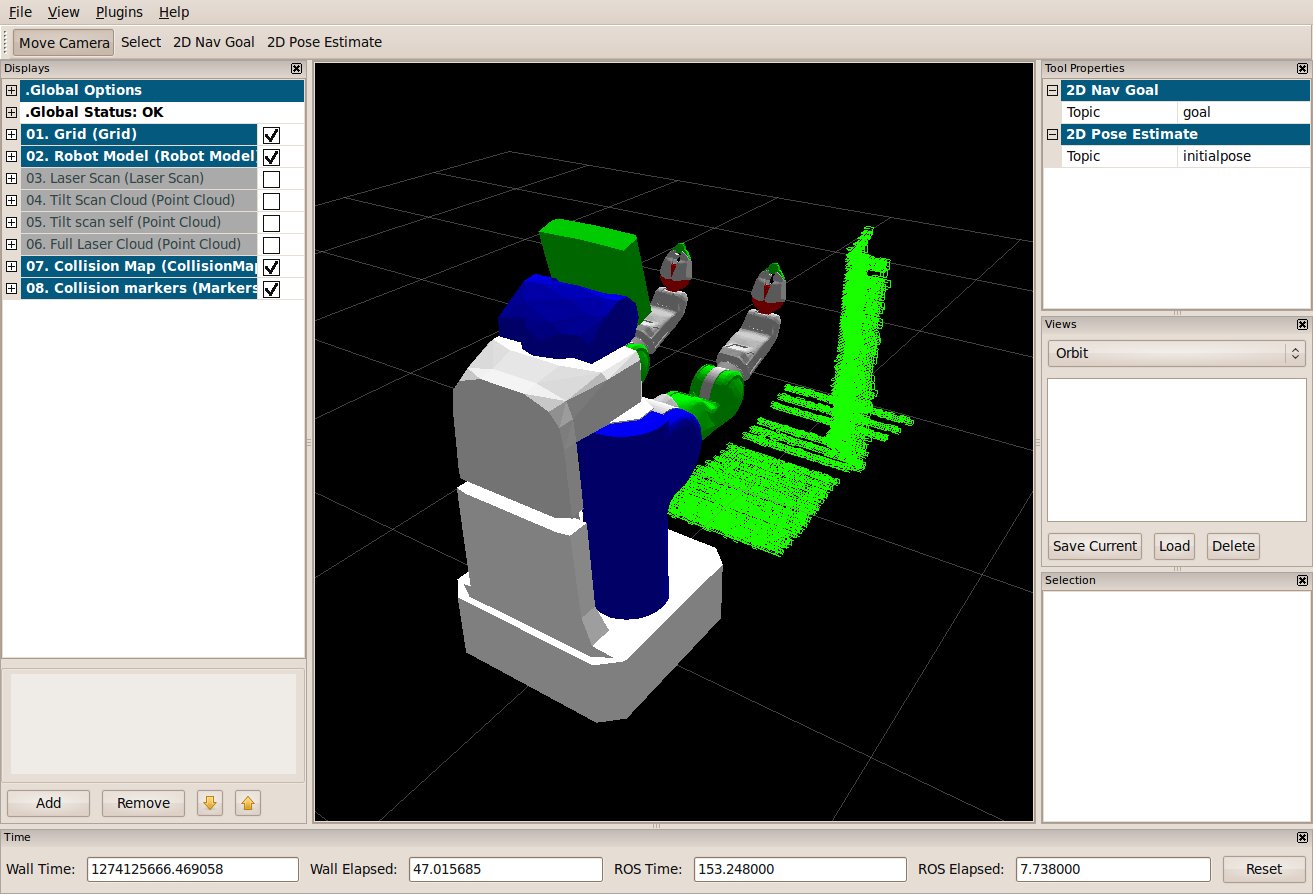
Let's look at a screenshot from the first tutorial in this series:

You'll note that the current position of the robot's arms occludes a good deal of the pole. If we were to attempt to do motion planning to get the arms to the other side of the pole the motion planner would probably quite reasonably attempt to go between the returned laser points and the floor, and would either knock over the pole or would force replanning once more of the pole becomes visible and the trajectory is deemed unsafe. One potential more efficient way to operate in this scenario would be to have some other node operate on the laser data and determine that having a free floating set of points in the environment is not necessarily as likely as a scenario where there's a pole, some of which is being blocked by the arms. This node could insert the pole directly into the collision map as a cylinder primitive which would then be used in collision detection; this should mean that the motion planners can then find a path which avoids the pole entirely. The pole becomes a known object. In this tutorial we will describe how to manipulate known objects and use them in collision checking.
Setup
If you have not already done so follow the directions in this tutorial for setup of the arm_navigation_tutorials package.
Start up the simulator
As before, launch the PR2 in simulation in the world with the pole:
roslaunch pr2_arm_navigation_tutorials pr2_floorobj_world.launch
Start up rviz
To launch rviz preconfigured for this tutorial run the following:
roslaunch pr2_arm_navigation_tutorials rviz_collision_tutorial_3.launch
Launch the perception pipeline
roslaunch pr2_arm_navigation_tutorials laser-perception.launch
Start up the environment server
roslaunch pr2_arm_navigation_actions environment_server_right_arm.launch
Launch the display for known model markers
This node lets us visualize known model markers:
roslaunch planning_environment display_planner_collision_model.launch
Adding a known object to the environment
In the arm_navigation_tutorials/src create a new file called addCylinder.cpp and place in it the following:
   1 #include <ros/ros.h>
   2
   3 #include <mapping_msgs/CollisionObject.h>
   4 #include <geometric_shapes_msgs/Shape.h>
   5
   6 int main(int argc, char** argv) {
   7
   8   ros::init(argc, argv, "addCylinder");
   9
  10   ros::NodeHandle nh;
  11
  12   ros::Publisher object_in_map_pub_;
  13   object_in_map_pub_  = nh.advertise<mapping_msgs::CollisionObject>("collision_object", 10);
  14
  15   ros::Duration(2.0).sleep();// This delay is so critical, otherwise the first published object may not be added in the collision_space by the environment_server
  16
  17   //add the cylinder into the collision space
  18   mapping_msgs::CollisionObject cylinder_object;
  19   cylinder_object.id = "pole";
  20   cylinder_object.operation.operation = mapping_msgs::CollisionObjectOperation::ADD;
  21   cylinder_object.header.frame_id = "base_link";
  22   cylinder_object.header.stamp = ros::Time::now();
  23   geometric_shapes_msgs::Shape object;
  24   object.type = geometric_shapes_msgs::Shape::CYLINDER;
  25   object.dimensions.resize(2);
  26   object.dimensions[0] = .1;
  27   object.dimensions[1] = .75;
  28   geometry_msgs::Pose pose;
  29   pose.position.x = .6;
  30   pose.position.y = -.6;
  31   pose.position.z = .375;
  32   pose.orientation.x = 0;
  33   pose.orientation.y = 0;
  34   pose.orientation.z = 0;
  35   pose.orientation.w = 1;
  36   cylinder_object.shapes.push_back(object);
  37   cylinder_object.poses.push_back(pose);
  38
  39   cylinder_object.id = "pole";
  40   object_in_map_pub_.publish(cylinder_object);
  41
  42   ROS_INFO("Should have published");
  43
  44   ros::Duration(2.0).sleep();
  45
  46   ros::shutdown();
  47 }
We will break this code down into small pieces:
  12   ros::Publisher object_in_map_pub_;
  13   object_in_map_pub_  = nh.advertise<mapping_msgs::CollisionObject>("collision_object", 10);
In this section we create a standard publisher with the topic collision_object. Your system may have a number of different processes that care about known objects; they can each listen to the collision object to be informed when any process is placing a known object into the environment.
  17   //add the cylinder into the collision space
  18   mapping_msgs::CollisionObject cylinder_object;
  19   cylinder_object.id = "pole";
  20   cylinder_object.operation.operation = mapping_msgs::CollisionObjectOperation::ADD;
  21   cylinder_object.header.frame_id = "base_link";
  22   cylinder_object.header.stamp = ros::Time::now();
In this section we create the object, assign it a unique string id pole and indicate that the operation we wish to use is ADD. This will either add the object to the environment or update the object's position if an object named pole already exists in the environment. We also add header information which will allow the motion planning environment to determine the frame to interpret the pose information. Note that the id is very important - it will allow this object to be removed individually, moved or altered, and will show up as an identifier in collisions.
This indicates the type of shape primitive we want to place in the environment, which in this case is a cylinder. The width of the cylinder goes in the first dimension and the height in the second.
This create a pose for the object, which should be in the frame indicated in the header.
  36   cylinder_object.shapes.push_back(object);
  37   cylinder_object.poses.push_back(pose);
We add the shape and pose to the vectors in the object. An object can have any number of shapes and poses - for instance, a point cloud that has been identified as an object could be added as a single object, or a table with different boxes for the top and the legs.
Compile and run the code
To compile you need to add the following line to your arm_navigation_tutorials/CMakeLists.txt:
rosbuild_add_executable(add_cylinder src/addCylinder.cpp)
Build, and then run the program from the command line with all the processes listed above running.
If the program works the window from which you launched the environment server should report the following:
[ INFO] [0.000000]: Added 1 object to namespace pole in collision space
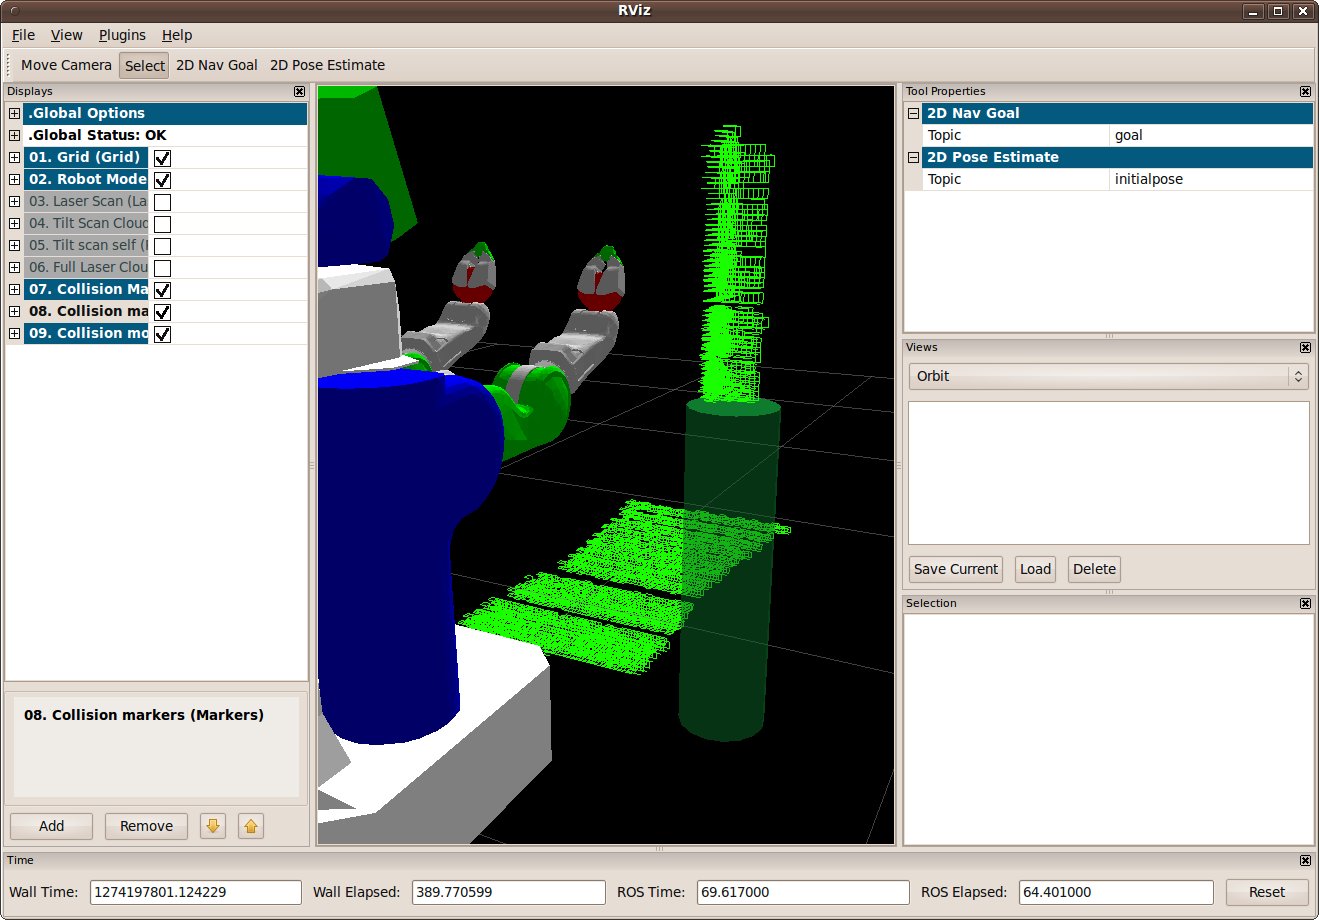
Most importantly, if you have the "Known objects" display enabled in rviz you should see something like the following:

You will note that eventually the square points on or near the known object have disappeared - they are getting filtered by the clear_known_objects node in the laser-perception.launch file. The reason for this is that there will tend to be some level of noise on range data. If an object's location is known precisely it makes sense to filter the ranged data hits near that object to avoid the noise. This is especially useful for grasping and manipulation, when spurious laser or stereo points near recognized objects can preclude collision-free operations near those objects.
Updating a known object
Once a known object is in the environment it's pose or shape can be easily updated by again using the ADD object operation. To see this, change the following lines in the addCylinder.cpp launch file:
27: object.dimensions[1] = 1.5;
31: pose.position.z = .75;
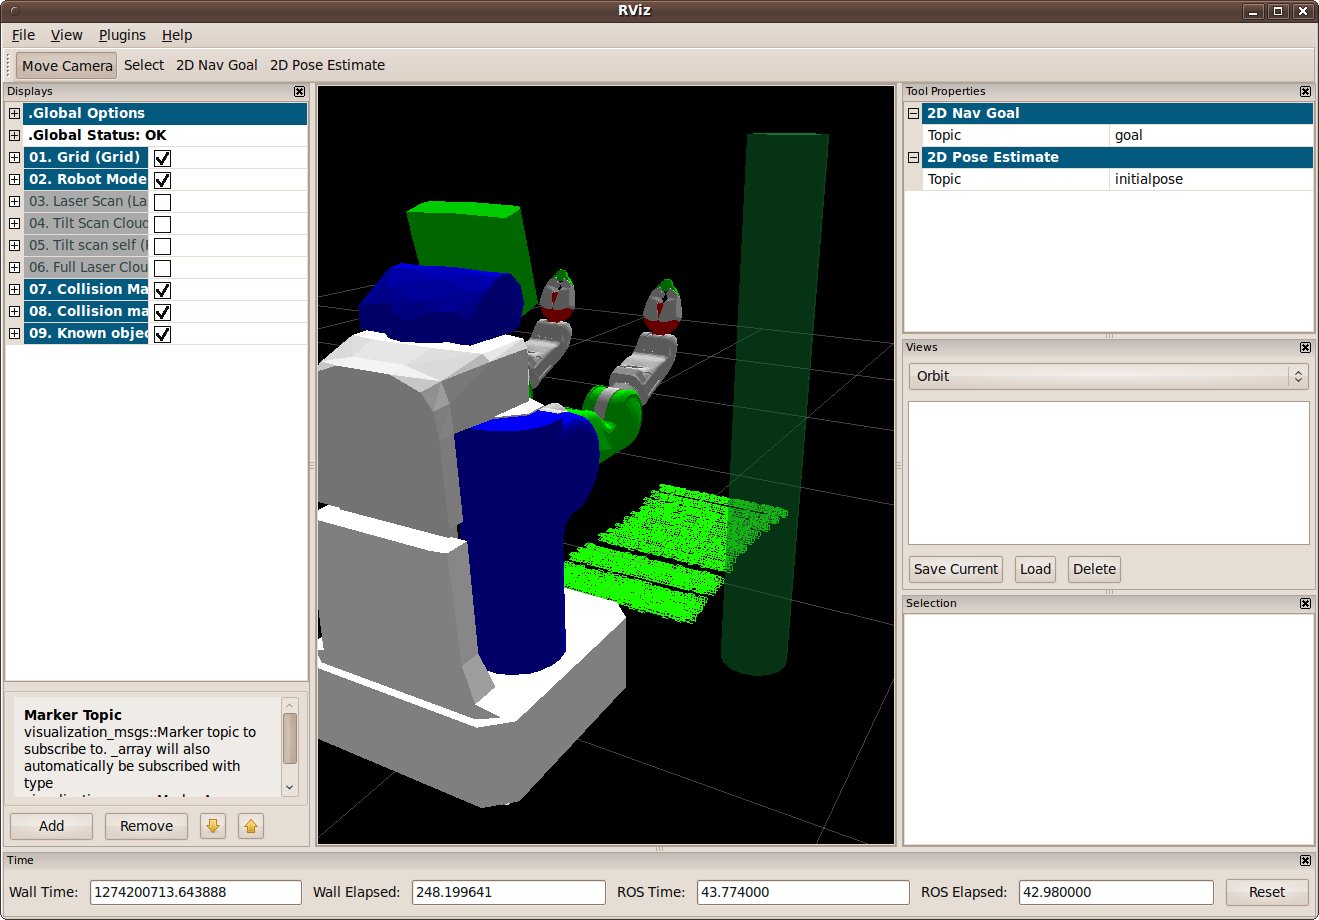
Recompile and run addCylinder. You should eventually end up with something like this once all or most of the points have been filtered:

There's still only a single pole in the environment. If we had changed the name to pole2 there would now be two different poles.
Checking for collisions with known objects
From the perspective of a user checking for collisions using the environment server works exactly the same as it did in this tutorial. However, collision marker reporting can give some additional useful information. Edit get_state_validity.cpp from the previous tutorial and make sure that line 23 reads:
23: req.robot_state.joint_state.position[0] = -0.55;
Recompile if necessary and run get_state_validity. The result should be a collision with error code -23. In rviz you should see yellow spheres for the environment server collision markers, and if you select one you should see that the name is a robot link and then +pole as the second object, as in this screenshot:

Removing objects
Known objects can also be easily deleted. Edit line 20 of addCylinder.cpp to read:
20: cylinder_object.operation.operation = mapping_msgs::CollisionObjectOperation::REMOVE;
The rest of the message will be ignored with the remove operation and can be left as it is. Recompile and run and you should see the known object disappear and the collision map points gradually return. In this command we specified pole by name, but you can also substitute the keyword all with the REMOVE operation and cause all known objects to be deleted.


