| Note: This tutorial assumes that you have completed the navigation tutorials. |
| |
Running the navigation stack on the Roomba
Description: This tutorial guides you through the process of setting up the navigation stack for the Roomba robot.Keywords: Roomba, navigation
Tutorial Level: BEGINNER
Contents
Connecting to the Roomba
Not all robots come equipped with Netbooks where you can just pop the lid and see what's going on. Typically you'll want to establish a remote connection from your computer to the robot's. There is a wide range of methods that you can use to establish a remote connection to the Netbook on the Roomba:
We usually resort to NX, but your choice will come down to your personal taste since the result is the same.
Starting the Roomba
Make sure both the Roomba and the Hokuyo laser are on. Open a new terminal window on the Roomba's Netbook and run the following command:
roslaunch lse_roomba_2dnav roomba_laser.launch
Lets take a look into the roomba_laser.launch file:
<launch>
  <node pkg="hokuyo_node" type="hokuyo_node" name="hokuyo_node" output="screen">
    <param name="frame_id" value="base_laser" />
  </node>

  <node pkg="roomba_500_series" type="roomba560_node" name="roomba560_node" output="screen">
  </node>

  <node pkg="lse_roomba_tf_setup" type="tf_broadcaster_laser" name="tf_broadcaster_laser" output="screen">
  </node>
</launch>
This launch file should star the following nodes:
hokuyo_node - this node is the Hokuyo driver.
roomba_560_node - this node is the Roomba driver.
tf_broadcaster_laser - this node provides the transformation between the Hokuyo and the Roomba.
If everything worked you should have a Roomba ready to go. All you need now is bring the navigation stack online.
Starting move base
Open a new terminal window on the Roomba's Netbook and run the following command:
roslaunch lse_roomba_2dnav move_base_isr_floor1.launch
This will start the navigation stack with a map of the first floor of ISR. You can change the map on the launch file for your own. Let's take a look at the move_base_isr_floor1.launch file:
<launch>
  <master auto="start"/>

  <!-- Run the map server -->
  <node name="map_server" pkg="map_server" type="map_server" args="$(find isr_maps)/maps/isr_floor1.pgm 0.050"/>

  <!--- Run AMCL -->
  <include file="$(find lse_roomba_2dnav)/params/amcl_roomba.launch" />

  <node pkg="move_base" type="move_base" respawn="false" name="move_base" output="screen">
    <rosparam file="$(find lse_roomba_2dnav)/params/costmap_common_params.yaml" command="load" ns="global_costmap" />
    <rosparam file="$(find lse_roomba_2dnav)/params/costmap_common_params.yaml" command="load" ns="local_costmap" />
    <rosparam file="$(find lse_roomba_2dnav)/params/local_costmap_params.yaml" command="load" />
    <rosparam file="$(find lse_roomba_2dnav)/params/global_costmap_params.yaml" command="load" />
    <rosparam file="$(find lse_roomba_2dnav)/params/base_local_planner_params.yaml" command="load" />
  </node>
</launch>
This launch file should star the following nodes:
map_server - this node provides the map.
amcl - this node provides the localization.
move_base - this node provides the actual planner and obstacle avoidance algorithms.
Notice that there are a lot of parameters being loaded for move_base. It is important to go through all the available parameters and understand how move_base works in order to achieve the desired performance out of the navigation stack.
Making the Roomba move
Now that all the necessary nodes are running you should be able to make the Roomba move. Open a terminal window on your computer and run the following command:
export ROS_MASTER_URI=http://roomba_netbook_ip_adress:11311
If you are having trouble with this section you can go back to the Multiple Machines tutorial.
Now start rviz:
rosrun rviz rviz
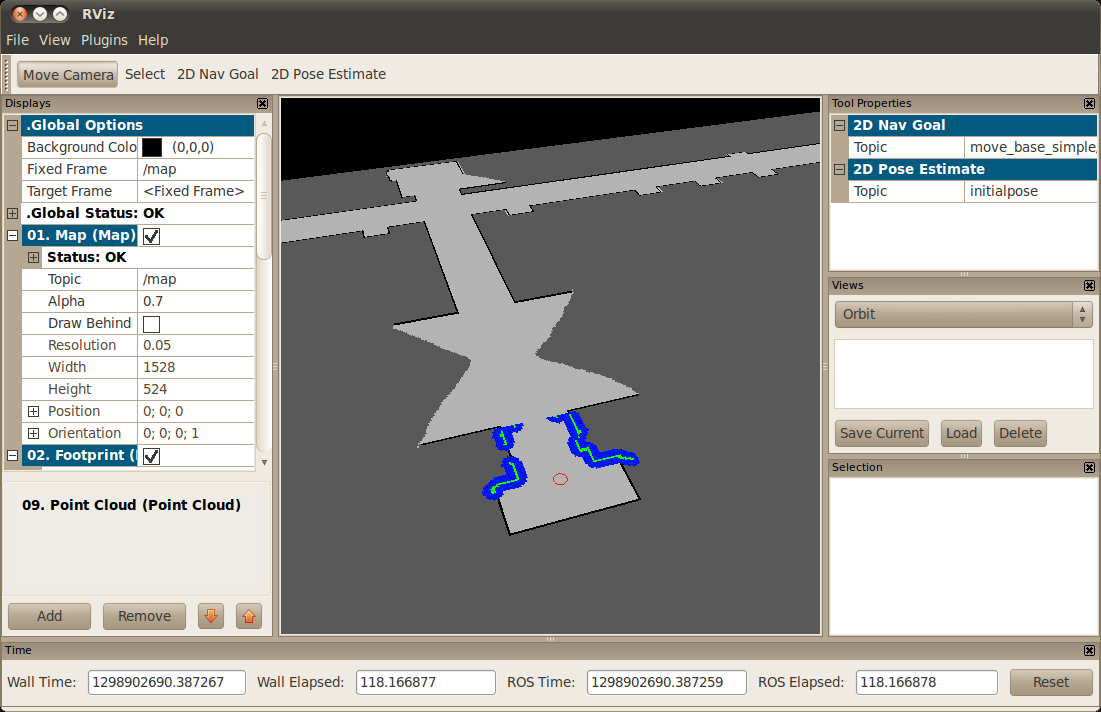
You can load the following .cvg file, lse_roomba_toolbox -> lse_roomba_2dnav -> 2dnav_roomba.vcg. You can use the "2D Pose Estimate" button to set the Roomba's initial pose.
You should be able to see something like this... 
Now you can send the Roomba to anywhere you want using the "2D Nav Goal" button! Congratulations! You can now use your Roomba with the navigation stack!
Credits
Thanks to Eitan Marder-Eppstein for providing the navigation parameters for the Roomba.


